_edited.png)
How Applying Cerakote Properly Can Transform Your Projects
- Brad Buerkle

- 4 days ago
- 4 min read
When it comes to protecting and enhancing the surfaces of your equipment, tools, or personal items, applying Cerakote properly is a game changer. This advanced ceramic coating offers exceptional durability, corrosion resistance, and a sleek finish that lasts. But how exactly is Cerakote applied professionally? What steps ensure the best results? And are there any drawbacks to consider? I’m here to walk you through the entire process, sharing practical tips and insights to help you understand what goes into a top-quality Cerakote job.
The Basics of Applying Cerakote Properly
Before diving into the detailed steps, it’s important to understand what makes Cerakote unique. Cerakote is a ceramic-based finish that bonds to metal, plastic, wood, and other materials. It’s widely used in industries like automotive, firearms, and industrial equipment because it offers superior protection against wear, chemicals, and heat.
Applying Cerakote properly involves several key stages:
Surface Preparation - Cleaning and sanding the item to ensure the coating adheres well.
Masking - Protecting areas that should not be coated.
Mixing the Cerakote - Preparing the coating to the right consistency.
Spray Application - Using a spray gun to apply thin, even layers.
Curing - Baking or air-drying the coated item to harden the finish.
Each step requires attention to detail and the right environment to achieve a flawless finish.

Step-by-Step Guide to Applying Cerakote Properly
Let’s break down the process in more detail so you can see what professional Cerakote application looks like from start to finish.
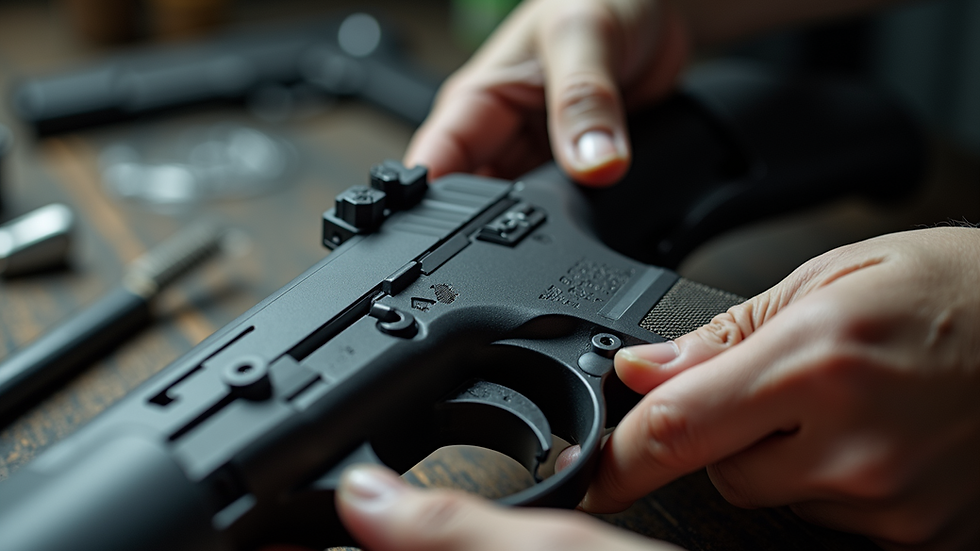
1. Surface Preparation
This is the most critical step. The surface must be free of oils, dirt, rust, and old finishes. Professionals often use media blasting (like sandblasting) to create a rough texture that helps the Cerakote bond better. After blasting, the item is cleaned with solvents to remove any residue.
Example: If you’re coating a firearm, every nook and cranny must be cleaned and blasted to ensure the coating sticks evenly and lasts.
2. Masking
Not every part of the item should be coated. Threads, internal mechanisms, or areas that require tight tolerances are masked off with high-temperature tape or plugs. This prevents the coating from interfering with the function of the item.
3. Mixing the Cerakote
Cerakote comes in a two-part formula: the base color and a hardener. Mixing these in the correct ratio is essential. Too much hardener can cause the coating to cure too fast and crack; too little can leave it soft and prone to damage.
4. Spray Application
Using a high-quality spray gun, the Cerakote is applied in thin, even coats. Multiple layers are common, with light sanding between coats to ensure smoothness. The spray booth should be dust-free and well-ventilated to avoid imperfections.
5. Curing
Once the final coat is applied, the item is cured. This can be done by baking in an oven at a specific temperature or air-drying for a longer period. Proper curing ensures the coating hardens fully and bonds to the surface.
This detailed process is why professional Cerakote application delivers such durable and attractive results.
What are the disadvantages of Cerakote?
While Cerakote offers many benefits, it’s important to consider some potential downsides before deciding if it’s right for your project.
Cost: Professional Cerakote application can be more expensive than traditional paint or powder coating due to the labor and materials involved.
Time-Consuming: The process requires careful preparation, multiple coats, and curing time, which means it’s not a quick fix.
Skill-Dependent: Achieving a flawless finish demands experience and precision. DIY attempts often result in uneven coverage or peeling.
Limited Thickness: Cerakote is thin compared to some coatings, so it won’t add much dimensional protection against heavy impacts.
Color Fading: Although resistant to chemicals and heat, prolonged UV exposure can cause some colors to fade over time.
Understanding these factors helps set realistic expectations and ensures you choose the right coating for your needs.

Tips for Getting the Best Results with Cerakote
If you’re considering Cerakote for your project, here are some practical recommendations to ensure success:
Choose a Reputable Professional: Look for experienced applicators who use proper equipment and follow industry standards.
Prepare Your Item Thoroughly: Don’t skip cleaning or masking steps. A well-prepared surface is the foundation of a durable finish.
Select the Right Color and Finish: Cerakote offers a wide range of colors and textures. Pick one that suits your style and functional needs.
Follow Aftercare Instructions: Avoid harsh chemicals and abrasive cleaning methods to prolong the life of your coating.
Consider Your Environment: If your item will be exposed to extreme conditions, discuss with your applicator about the best Cerakote formula for your use case.
By following these tips, you can maximize the benefits of your Cerakote coating and enjoy a long-lasting, attractive finish.
Why Choose Professional Cerakote Application?
You might wonder why professional application matters so much. After all, can’t you just spray it yourself? The answer lies in the precision and quality control that professionals bring.
Professional applicators have:
Specialized Equipment: High-end spray guns, media blasting cabinets, and curing ovens.
Controlled Environments: Dust-free spray booths and temperature-controlled curing areas.
Expertise: Years of experience in mixing, spraying, and curing Cerakote to perfection.
Warranty and Support: Many professionals offer guarantees on their work, giving you peace of mind.
When you invest in professional cerakote application, you’re not just paying for the coating itself but for the skill and care that ensure your project looks great and lasts longer.
Final Thoughts on Applying Cerakote Properly
Applying Cerakote properly is a detailed process that requires the right tools, environment, and expertise. From surface preparation to curing, every step plays a vital role in achieving a durable, high-performance finish. While there are some disadvantages to consider, the benefits often outweigh them, especially when you choose a professional service.
If you want your equipment, tools, or personal items to stand up to tough conditions and look fantastic, investing in professional Cerakote application is a smart choice. With the right approach, your project will not only be protected but also enhanced with a finish that’s both functional and visually appealing.
Ready to transform your project with Cerakote? Remember, the key is in the details and the expertise behind the application.


Comments